Creating Multiscale Images#
Sometimes it is useful or necessary to study processes across multiple scales. It is possible to generate artificial images with 2 scales of porosity fairly easily.
import matplotlib.pyplot as plt

import porespy as ps
Using blobs of different blobiness#
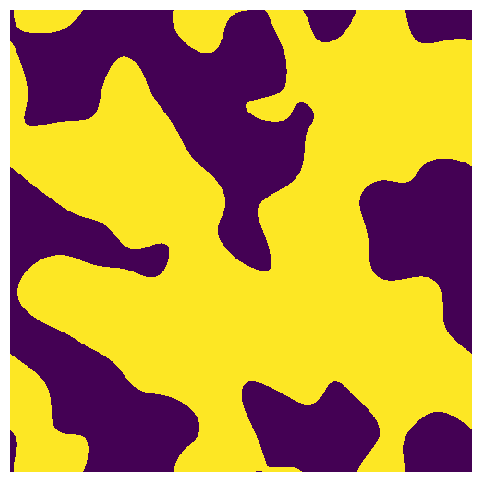
Start by creating one image at a large scale. Let’s use blobs to define the large scale ‘super-structure’:
im1 = ps.generators.blobs([500, 500], blobiness=0.5, porosity=0.6)
fig, ax = plt.subplots(1, 1, figsize=[6, 6])
ax.imshow(im1, interpolation="none")
ax.axis(False);
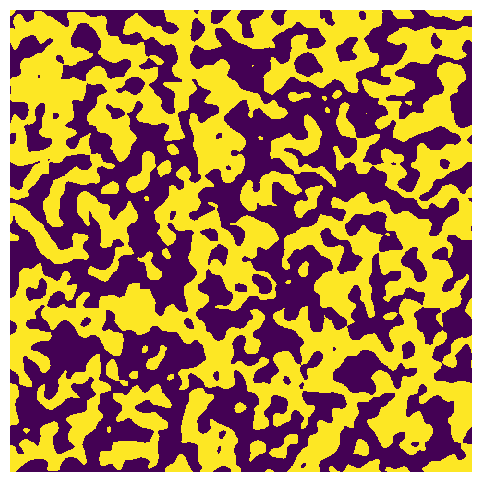
Now we’ll can create a second image of blobs, but with a different scale. These will represent the ‘sub-structure’:
im2 = ps.generators.blobs([500, 500], blobiness=2.5, porosity=0.5)
fig, ax = plt.subplots(1, 1, figsize=[6, 6])
ax.imshow(im2, interpolation="none")
ax.axis(False);
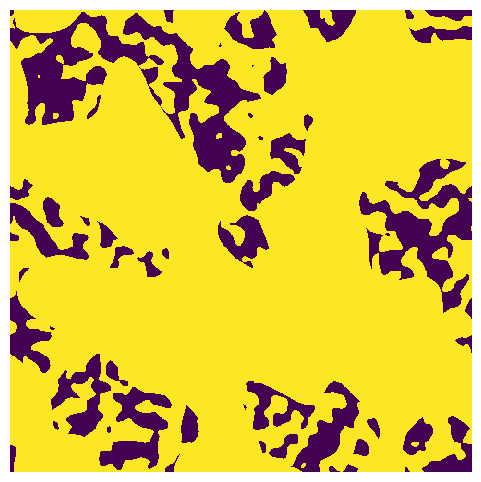
Finally, we can multiply these two image (i.e. arrays) together, which will have the effect of perforating the foreground phase of im1 with holes defined by the background phase of im2. Note the inverting of the image to ensure the foreground and background are maintained:
im3 = ~(~im1 * im2)
fig, ax = plt.subplots(1, 1, figsize=[6, 6])
ax.imshow(im3, interpolation="none")
ax.axis(False);
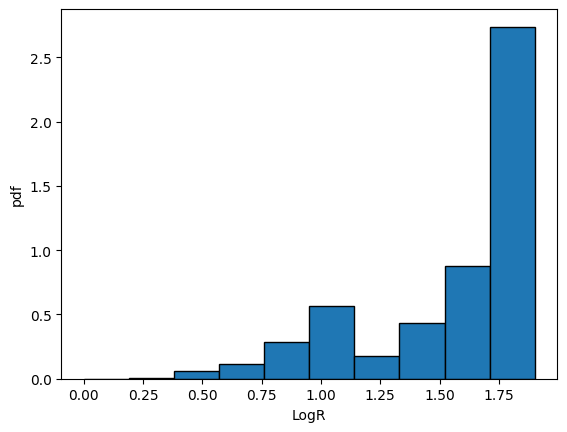
The pore sizes can be analyzed using local_thickess, to confirm a bi-modal pore size distribution:
lt = ps.filters.local_thickness(im3)
psd = ps.metrics.pore_size_distribution(lt)
ps.visualization.bar(psd);
Using random_spheres to insert non-overlapping spheres into blobs#
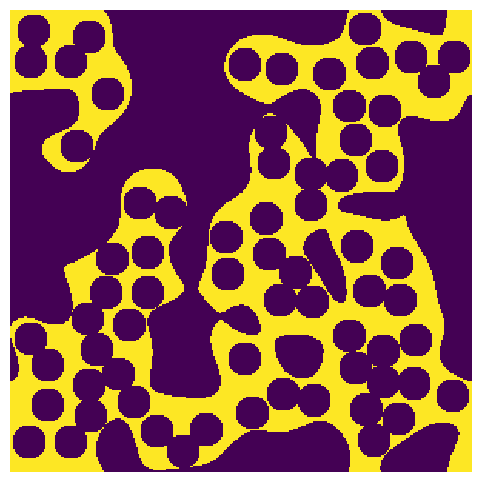
Another way is to use random_spheres to insert spheres into the foreground of another image. Let’s use blobs to define the superstructure, the perforate it with holes. Note that we invert the image (~) before passing it to random_spheres so that the holes are added to the solid phase, then the result is inverted back.
im1 = ps.generators.blobs([300, 300], blobiness=0.5, porosity=0.6)
im2 = ~ps.generators.random_spheres(im=~im1, r=10, clearance=-2)
fig, ax = plt.subplots(1, 1, figsize=[6, 6])
ax.imshow(im2, interpolation="none")
ax.axis(False);
Summary#
The concept of generate multiple images and different scales then superimposing them is a very easy to make some simple multiscale images for prototyping and testing workflows that require multiscale images.